If you want to speed up your WordPress site, finding ways to reduce the size of your images offers a big return on your investment.
On average, images account for about half of a webpage’s file size, so even small improvements can have big results.
WebP is a modern image format that can help you reduce the size of your images without changing how they look. On average, learning how to convert an image to WebP can shrink its size by ~25-35% with no discernible loss in quality.
That’s why we’ll dive deep into the topic in this blog post!
Ready? Let’s get started!
What is WebP?
So…what is a WebP file? In a nutshell, WebP is an image format that’s developed by Google. For example, you have image formats like JPEG or JPG and PNG, right? Well, WebP is an alternative file format for images.
WebP is focused on delivering the same image file, just with a smaller file size. By reducing the size of your image files, you can still deliver the same experience to your website’s visitors but your site will load faster.
For example, in Google’s WebP compression study, Google found that a WebP image file is on average…
- 25-34% smaller than a comparable JPEG image.
- 26% smaller than a comparable PNG image.
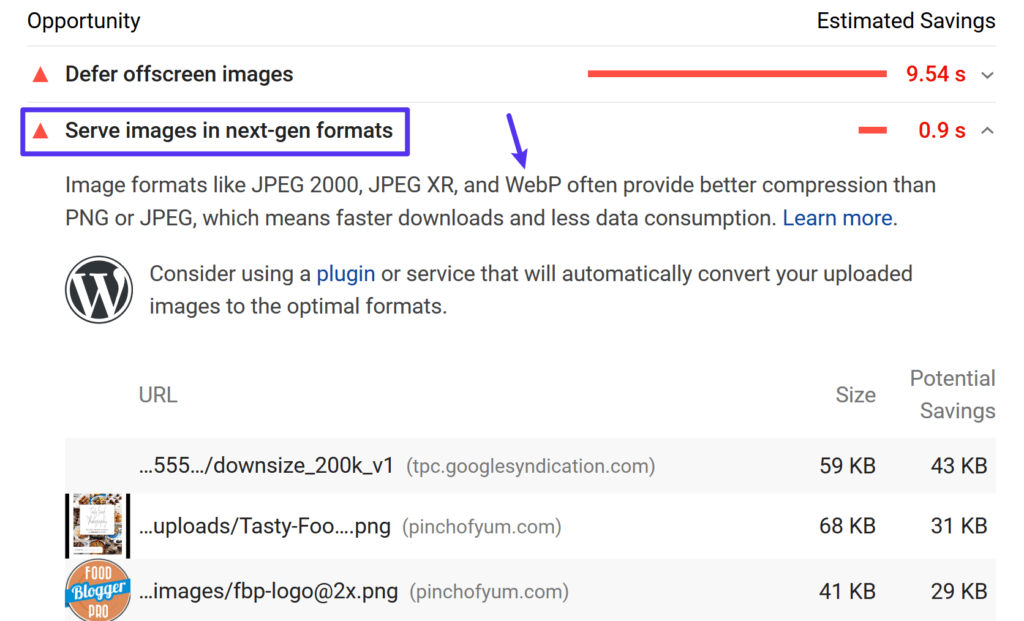
This is why, if you run your site through PageSpeed Insights, one of the many recommendations is to Serve images in next-gen formats like WebP:

Google PageSpeed Insights suggests using WebP images
So how does Google’s WebP format achieve these reductions in file size?
WebP supports both lossy and lossless compression, so the exact reduction will depend on whether you’re using lossy or lossless compression
With lossy WebP compression, WebP uses something called “predictive coding” to lower the file size. Predictive coding uses the values of neighboring pixels in an image to predict values and then only encodes the difference. It’s based on VP8 key frame encoding.
Lossless WebP uses a much more complicated set of methods that were developed by the WebP team.
If you want to learn about the WebP compression techniques in detail, this article is a good starting point.
Which Web Browsers Support WebP?
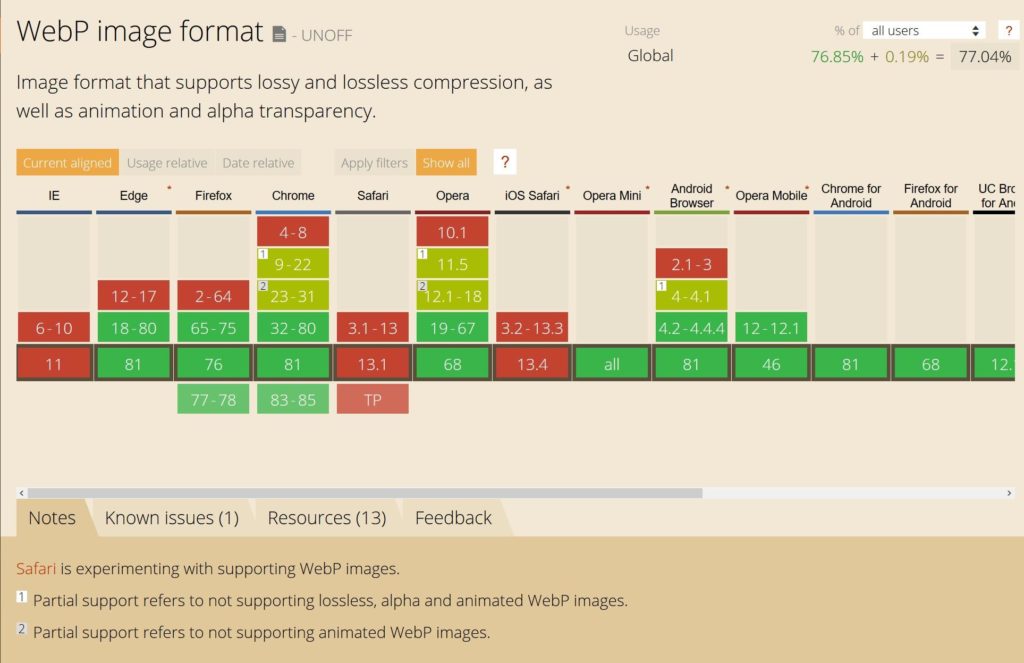
In order for WebP images to work, a visitor’s web browser needs to support them. Unfortunately, while browser support has grown a lot, WebP compatibility is still not universal.
WebP images are supported by popular browsers such as:
- Chrome (desktop and mobile).
- Firefox (desktop and mobile).
- Edge.
- Opera (desktop and mobile).
However, the notable holdout is Safari. At the time that we’re writing this post, neither the desktop nor mobile versions of Safari support WebP images. Apple briefly experimented with WebP support for Safari in 2016, but there’s been no further push since then.
Internet Explorer also lacks WebP support (but Edge does support WebP because it’s based on Chromium).
In total, around 77% of Internet users use a browser that supports WebP. So while it certainly has majority support, that 23% is too big to ignore (in our WordPress WebP tutorial below, we’ll show you how to handle this so that all of your visitors have a great experience):

WebP support
WebP vs JPG vs PNG Size Comparison
According to Google’s tests, WebP images are:
- 25-34% smaller than comparable JPEG images.
- 26% smaller than comparable PNG images.
If you want to learn more about Google’s methodology, you can find direct links to the full results below:
Both tests are based on over 11,000 images including:
We’ll show you how.
Subscribe Now
- The famous Lenna image
- 24 images from Kodak true color image suite
- 100 images from Tecnick.com
- A random sample of 11,000+ images from Google Image Search
How to Use WebP Images on WordPress
Because not all browsers support WebP images, you can’t just upload WebP image files in your Media Library and directly use them in WordPress like you can with JPEGs and PNGs.
Again, 23% of people (including all Safari users) use a web browser that doesn’t support WebP. If you convert WebP images and use them directly in your content, those visitors wouldn’t be able to see your images, which would ruin their browsing experience.
Don’t worry, there is a solution!
Instead of uploading WebP images to WordPress directly, you can use a WordPress plugin that converts your original images to the WebP format and also provides the original image as a fallback if a visitor’s browser doesn’t support WebP.
For example, if you upload a JPEG file to your site, the plugin will:
- Convert the JPEG file to WebP and use the WebP version for visitors browsing with Chrome, Firefox, etc.
- Show the original JPEG file to visitors browsing with Safari and other browsers that don’t support WebP.
That way, everyone can see your image and everyone gets the fastest experience possible.
Below, we’ll go through some of the best WebP WordPress plugins, all of which work with Kinsta and the Kinsta CDN.
Info
If you are hosting at Kinsta, you’ll need to reach out to our support so that we can create an Nginx rule for WebP cache buckets for some of these plugins.
ShortPixel
ShortPixel is a popular WordPress image optimization plugin that can help you automatically resize and compress the images that you upload to your WordPress site.
As part of its feature list, ShortPixel can also help you automatically convert images to WebP and serve those images to browsers that support WebP.
ShortPixel has a limited free plan that lets you optimize ~100 images per month for free. After that, paid plans start at $4.99 per month for up to 5,000 images/credits or $9.99 one-time for a pack of 10,000 credits.
ShortPixel counts each WordPress image size that you optimize as a credit. So if you want to optimize multiple image thumbnail sizes, one image could conceivably use multiple credits. There are no file size limits for images.
You can spread your ShortPixel credits over unlimited websites – there are no per-site limits (and all your websites can use the same ShortPixel account).
To use ShortPixel to serve WebP images on WordPress, you’ll need to install the plugin from WordPress.org and add your API key (which you can get by registering for a free ShortPixel account).
In the General tab, you can set up basic settings for how image optimization works. For example, what compression level to use and whether or not to resize images:
How to set compression level and image dimensions in ShortPixel
To enable WebP images, go to the Advanced tab and:
- Check the box for WebP Images
- Check the box to Deliver the WebP versions.. (this appears after you check the first box)
- Select the radio button for Using the <PICTURE> tag syntax (this appears after checking the previous box)
- Leave the default Only via WordPress hooks selection
How to enable WordPress WebP images in ShortPixel
Then, save your changes.
If you’re hosting at Kinsta, ShortPixel will give you a warning message about configuring server config files on Nginx. To configure these settings, you can reach out to Kinsta support and we’ll be happy to set up the server configuration for you.
Imagify
Imagify is a popular image optimization plugin from the same developer as WP Rocket (which is one of the few caching plugins that works with Kinsta).
It can automatically compress and resize the images that you upload to your WordPress site. Then, it can also help you convert them to WebP and serve WebP versions to visitors with browsers that support it.
In terms of features, ShortPixel and Imagify share a lot of similarities. The biggest difference comes when you look at pricing. Whereas ShortPixel charges you based on images with no size limit per image, Imagify charges you based on overall file size, with no image limit.
So if you need to optimize lots of large images, ShortPixel’s approach might be cheaper. But if you need to optimize lots of small images, Imagify’s approach might be cheaper.
Tired of a slow host for your WordPress site? We provide blazing fast servers and 24/7 world-class support from WordPress experts. Check out our plans
Imagify has a limited free tier that allows for 25 MB of optimizations per month. After that, paid plans start at $4.99 per month for up to 1 GB or $9.99 for a one-time credit of 1 GB.
Like ShortPixel, you can spread your account limits over unlimited websites.
To use Imagify to deliver WordPress WebP images, you’ll need to install the plugin from WordPress.org and add your API key to get started.
Once you’ve activated the plugin, you can use the General Settings box to choose your compression level.

How to set compression level in Imagify
To enable WebP images, scroll down to the Optimization section and find the WebP Format section:
- Check the box to Create webp versions of images
- Check the box to Display images in webp format…
- Select the radio button to use <picture> tags
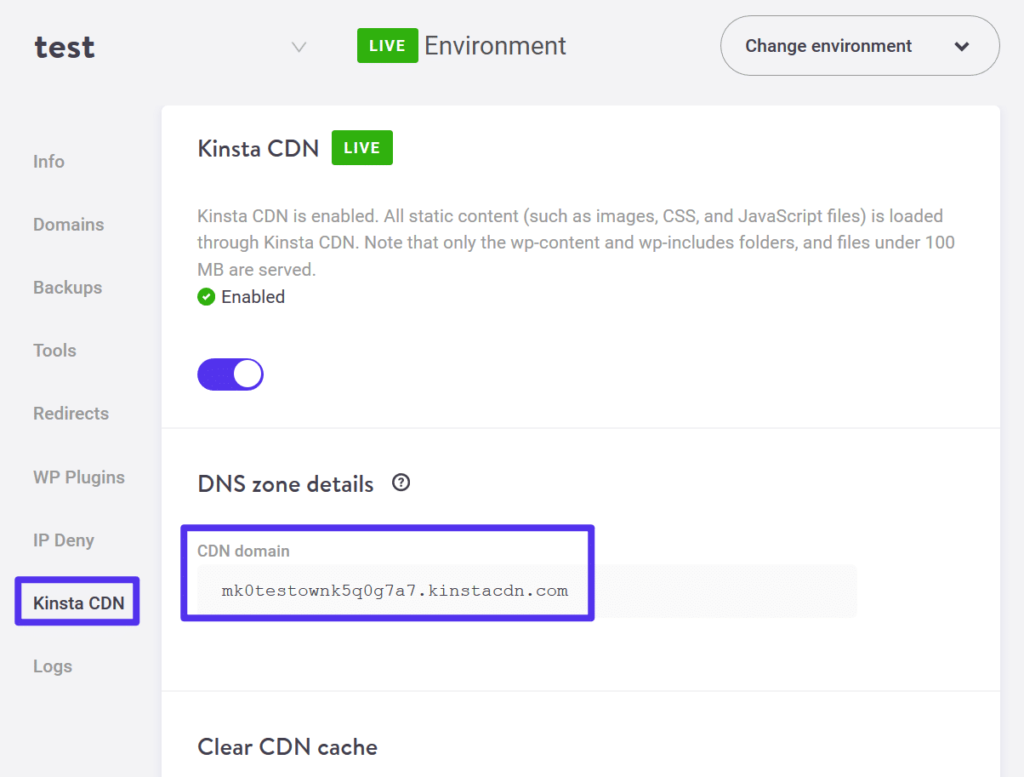
- If you’re hosting at Kinsta and using the Kinsta CDN, enter the URL of your Kinsta CDN in the If you use a CDN box (we’ll tell you how to find the Kinsta CDN URL below)

How to enable WordPress WebP images in Imagify
If you’re using the Kinsta CDN, you can find your CDN URL by opening your site in the MyKinsta dashboard and visiting the Kinsta CDN tab of the site’s settings:

How to find Kinsta CDN URL
As with ShortPixel, if you’re hosting at Kinsta, you’d need to create an Nginx rule for WebP cache buckets (simply reach out to Kinsta support).
Optimole
Optimole is a WordPress image optimization plugin that operates a little differently than Imagify and ShortPixel. Optimole can automatically compress and resize your images. However, it also has two other notable features:
- It can serve your images via its own CDN (powered by Amazon CloudFront).
- It offers real-time adaptive images whereby Optimole will deliver the optimally sized image for each visitor. For example, someone browsing on a small screen will get a lower-resolution image than someone browsing on a Retina screen.
This approach is similar to other real-time optimization/manipulation services like Cloudinary, imgix, KeyCDN Image Processing, etc.
As part of this real-time image optimization, Optimole can also deliver WebP images to visitors with browsers that support it.
Optimole has a limited free plan that can handle serving images to around ~5,000 visitors per month. After that, paid plans start at $19 per month for ~25,000 visitors.
To get started, you’ll need to install the plugin from WordPress.org and activate it with an API key (which you can get by registering for a free Optimole account).
Once you do that, Optimole will start automatically optimizing your images and delivering them via its CDN. WebP support is on by default, so there’s no need to manually enable it.
To configure other settings, like compression levels and scaling behavior, you can go to Media → Optimole → Settings:

The Optimole settings area – WordPress WebP images are enabled by default
Since Optimole handles delivering your images via its own CDN, there’s no need to set up any Nginx rules if you’re hosting at Kinsta.
Summary
Your WordPress site’s images make up a big part of the file size of an average page. If you can find ways to reduce the size of your images, you can speed up your site without changing the experience of your visitors.
WebP is a modern image format that can offer a ~25% reduction in file size vs comparative JPEG or PNG files.
Most modern browsers support WebP and around 77% of Internet users have a browser that supports WebP. However, some browsers, notably Safari, still don’t offer WebP support, so you cannot serve WebP images to all visitors.
To address this issue, you can use a WordPress plugin that converts images to WebP and serves WebP versions to visitors whose browsers support this format, while using the original images to visitors whose browsers don’t support it.
Three plugins that can help you do this are:
- ShortPixel.
- Imagify.
- Optimole.
For more tactics to optimize images, check out our full guide to optimize images for web performance.
Do you have any questions about how to use WebP on WordPress? Ask us in the comments.
The post How to Use WebP Images on WordPress (And Shrink Image File Sizes up to 35%) appeared first on Kinsta Managed WordPress Hosting.


You must be logged in to post a comment.